Exhaust components work in a harsh environment. They face road salt, water, vibration, acidic condensation, and repeated thermal shocks. A cold-start pipe can move from freezing conditions to several hundred degrees within minutes. This stress slowly weakens joints, hangers, catalytic converters, diesel particulate filters, and oxygen sensors.
The question is practical: How to extend the service life of exhaust components without hiding underlying faults? S&P Global Mobility reported that the average age of vehicles on U.S. roads reached about 12.6 years in 2024. Older vehicles need more than occasional visual checks. They require disciplined inspection, correct engine maintenance, and timely control of corrosion. The U.S. Environmental Protection Agency’s Automotive Trends Report also shows how modern emission systems have become more technically complex. More sensors and after-treatment devices mean more potential failure points.
Small details matter.
A loose heat shield can create a sharp metallic rattle. A blocked drain hole can trap moisture inside a muffler. An incorrect fuel mixture can raise exhaust temperatures and damage catalysts. This guide examines ten practical methods for protecting exhaust components, based on workshop experience, manufacturer guidance, and established emissions research. It covers cleaning, thermal management, mounting checks, corrosion prevention, diagnostic testing, and driving habits.
No checklist is perfect. Some failures develop inside the substrate before visible damage appears. That limitation deserves attention. Reliable maintenance therefore combines physical inspection with scan-tool data, exhaust backpressure testing, and service records. Careful owners may extend component life, reduce unexpected repairs, and preserve emissions performance for longer.
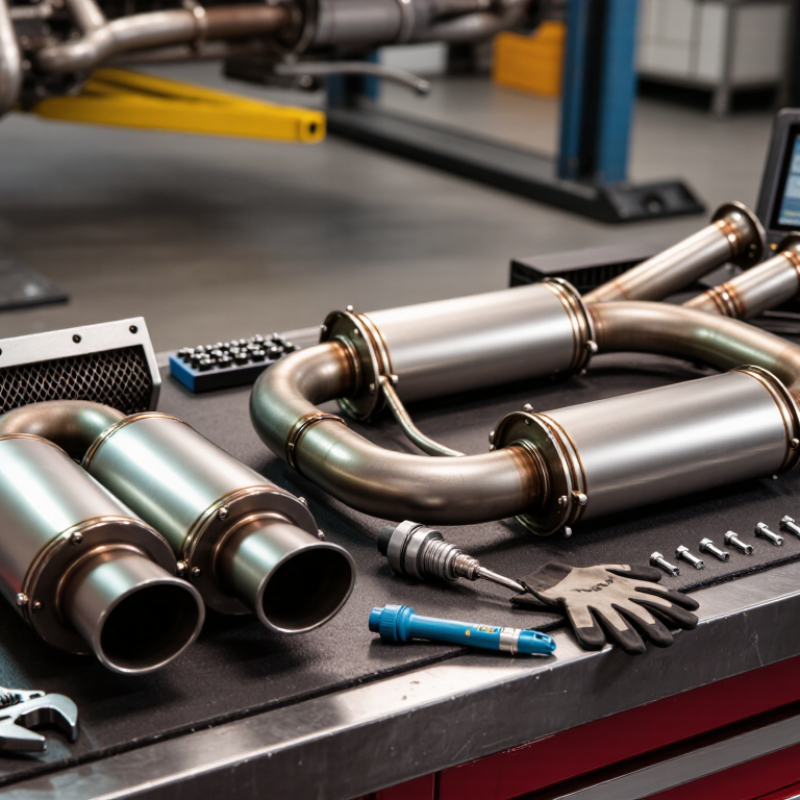
Exhaust components rarely fail without warning. Heat cycles gradually weaken metal, seals, joints, and mounting points. Repeated expansion and contraction can create tiny cracks around welds. Condensation also collects inside the system during short trips. That moisture encourages internal corrosion, especially when the engine seldom reaches full operating temperature. Road salt, mud, and standing water accelerate external damage. A clean-looking surface can mislead.
Driving habits matter more than many owners expect. Frequent short journeys leave water vapor trapped inside mufflers and pipes. Heavy loads increase exhaust temperature and stress flexible sections. Rough roads transfer sharp vibration through hangers and brackets. Misaligned components may rattle before they break. Listen closely.
During practical inspections, technicians should check discoloration, loose shields, cracked rubber mounts, and black soot near joints. Soot often reveals a developing leak. Measuring exhaust backpressure can identify restrictions that visual checks miss. However, no inspection method is perfect. I have learned that small noises are easy to dismiss until they become expensive repairs. This is a useful reminder to record changes early.
Use correct mounting hardware and replace damaged supports promptly. Avoid striking pipes against curbs or lifting equipment. Letting the engine idle briefly may help lubrication, but excessive idling does not remove internal moisture efficiently. Service intervals should reflect climate, mileage, load, and driving patterns. Two vehicles with identical mileage may experience very different exhaust wear. Regular inspections remain the most reliable way to extend component life.
Inspecting exhaust parts early can prevent small defects from becoming expensive repairs. Start with a cold-system visual check. Use a bright inspection lamp and examine welds, clamps, hangers, and heat shields. Look for rust bubbles, stretched rubber mounts, dents, and fresh soot marks. Black deposits near a joint often indicate escaping exhaust gases. A sharp metallic rattle may signal a loose shield or damaged internal baffle. Do not ignore water dripping from an unusual location. Condensation is normal at the tailpipe, but repeated leaks near connections deserve attention.
The UK Driver and Vehicle Standards Agency’s MOT Testing Data for 2023–24 covers more than 35 million tests and lists emissions defects as a distinct inspection category. That supports regular checks, not occasional guesses. TÜV Report 2025 reviewed roughly 10 million vehicle inspections and reported major-defect rates rising from about 6% in newer cars to nearly 28% for 12–13-year-old vehicles. Age matters.
A technician should also compare cold-start noise with fully warmed operation. Inspect inside the tailpipe for excessive dry soot or oily residue. These signs may point to wider engine or emissions problems, not only a damaged muffler. A smoke test can locate leaks that eyesight misses. Still, visual inspection is imperfect. Road salt, hidden corrosion, and rushed checks can conceal damage. Record photos, dates, and mileage after every inspection. Small records often reveal patterns before the exhaust becomes unsafe or expensive.
| No. | Service-Life Extension Method | Early Warning Signs to Inspect | Recommended Inspection Interval | Why It Helps | Action Level |
|---|---|---|---|---|---|
| 1 | Inspect the exhaust manifold and gaskets | Soot marks near the flange, ticking noises during cold start, broken studs, or visible cracks. | At every oil service and whenever a ticking sound develops. | Early repair limits hot-gas erosion, protects nearby wiring, and reduces thermal stress on the cylinder head. | High — repair leaks promptly. |
| 2 | Check pipes and catalytic-converter joints for leaks | Black deposits, hissing or popping sounds, exhaust odor, or increased cabin noise. | Every 6 months or approximately every 10,000 km, and after underbody impact. | Prevents oxidation around joints and reduces the risk of exhaust gases entering the passenger compartment. | High — investigate any leak. |
| 3 | Examine hangers, brackets, and rubber isolators | Sagging pipes, stretched or split rubber, metal-to-metal contact, and excessive movement when the exhaust is lightly shaken. | Every 12 months or during routine underbody inspections. | Maintains alignment and prevents vibration fatigue, cracked welds, and impact damage. | High — replace damaged supports. |
| 4 | Remove corrosion before it becomes perforation | Flaking scale, blistered coating, pinholes, brown discoloration, or thinning around seams and drain points. | Before and after winter or wet-season driving; at least twice per year in salted areas. | Reduces the spread of rust caused by moisture, road salt, and condensation inside the exhaust system. | Medium — monitor surface rust; replace perforated metal. |
| 5 | Inspect heat shields and insulation | Rattling at specific engine speeds, loose fasteners, missing shields, or heat discoloration on nearby components. | At every scheduled service and after contact with road debris. | Controls radiant heat and helps protect the floor, fuel lines, wiring, and other heat-sensitive parts. | High — secure or replace loose shields. |
| 6 | Keep the exhaust system correctly aligned | Uneven clearance from the body, contact marks, tilted mufflers, or a tailpipe that moves excessively. | After suspension work, collision repairs, or any underbody impact. | Correct alignment prevents stress at welds, flanges, flexible joints, and mounting points. | Medium — correct before vibration worsens. |
| 7 | Check the flexible joint and braided section | Frayed braid, soot staining, split bellows, abnormal vibration, or a louder exhaust note under acceleration. | Every 12 months and whenever engine movement or vibration increases. | A sound flexible joint absorbs engine movement and protects downstream pipes from fatigue cracking. | High — replace if leaking or torn. |
| 8 | Monitor muffler and resonator condition | New droning, rattling baffles, bulges, drain-hole enlargement, or damp areas caused by internal condensation. | At least annually, with extra checks on vehicles used for short trips. | Early detection can prevent internal deterioration from becoming a complete muffler failure. | Medium — schedule repair when noise changes. |
| 9 | Protect oxygen-sensor wiring and connectors | Melted insulation, chafing, oil contamination, loose clips, warning lights, or unstable engine performance. | During every exhaust repair and whenever a diagnostic fault is recorded. | Maintains accurate emissions feedback and prevents heat or vibration damage to sensor circuits. | High — correct routing and wiring faults. |
| 10 | Perform a complete post-repair inspection | Loose clamps, missing fasteners, incorrect clearances, fresh soot, or contact noises during a controlled road test. | After every exhaust repair, component replacement, or underbody service. | Confirms that the system is sealed, supported, thermally protected, and free from interference. | High — verify before returning the vehicle to service. |
Exhaust components face heat, moisture, road salt, and acidic condensation every day. Corrosion often begins where grime remains trapped near welds, clamps, and heat shields. During workshop inspections, I have found small rust bubbles hiding under thick deposits. The damage was easy to miss. The NACE IMPACT Study estimated global corrosion costs at 2.5 trillion dollars annually, equal to about 3.4% of global GDP. It also reported that 15–35% of corrosion costs could be prevented through better management.
Cleaning must begin with a completely cooled exhaust system. Spraying cold water onto hot metal can create thermal shock and worsen surface damage. Use a soft brush, clean water, and a mild, non-corrosive detergent to remove salt and oily residue. Dry the seams carefully, especially around bends and mounting points. Inspect monthly during winter driving. Look for flaky scale, pinholes, loose hangers, and dark stains near welds. Small defects matter.
Protective work should match the component’s temperature. A high-temperature coating can slow oxidation, but only after rust, oil, and loose scale are removed. Surface preparation is often the weak step. I have seen good coatings fail because hidden moisture remained beneath them. Improve drainage, repair damaged heat shields, and replace weakened fasteners promptly. The advice is not perfect: frequent cleaning cannot stop every failure. However, it can reveal problems before vibration and heat turn minor corrosion into an expensive replacement. Sources: NACE IMPACT Study, 2016; AMPP corrosion management guidance.
Proper engine tuning directly affects exhaust component life. An overly rich mixture can send unburned fuel into the exhaust, creating excessive heat and deposits. An overly lean mixture may raise combustion temperatures and stress valves, manifolds, and catalytic components. Neither condition is harmless.
Use approved diagnostic equipment to check fuel trims, ignition timing, misfires, and sensor readings. Small changes matter. A rough idle, delayed throttle response, or repeated fault code should not be ignored. During routine service, inspect spark plugs and compare their condition with engine data. A clean-looking plug does not always prove correct tuning. I have seen exhaust damage continue because the original fault was treated as a separate issue.
Alignment is equally important. Exhaust pipes should sit evenly within their heat shields, with clear space around wiring, body panels, and underfloor components. Misaligned sections place constant force on welds, flanges, and rubber hangers. Check the system after it cools, then inspect it again after a short drive. Thermal expansion can reveal contact marks that were invisible in the workshop. Tighten connections in the correct sequence, and replace stretched or cracked hangers rather than forcing the pipe into position. It is easy to rush this step. That mistake can shorten service life. Keep a record of temperature readings, replaced parts, and recurring noises, so later inspections rely on evidence rather than memory.
Top 10 Ways to Extend the Service Life of Exhaust Components
Replacing worn exhaust components with compatible, high-quality parts is one of the most practical maintenance decisions. A correct fit prevents leaks, vibration, and uneven stress. Check the vehicle’s specifications, pipe diameter, connection style, and heat rating before purchasing. A part that looks similar may still fit poorly.
In my experience, cheap clamps and weak hangers often fail before the main pipe. High-quality replacements should resist corrosion and repeated heat cycles. Inspect gaskets, flex pipes, brackets, and fasteners during every repair. Small cracks can become noisy leaks within weeks. I once overlooked a tired hanger, and the new pipe developed unnecessary strain. That mistake was avoidable.
Tips: Compare the replacement part with the removed component before installation. Clean rusty connection points carefully. Use new sealing hardware when required. Tighten fasteners evenly, then check for movement after a short drive. If exhaust fumes enter the cabin, stop driving and seek qualified service immediately. Never modify emission-control equipment to solve a fitment problem. Manufacturer specifications and local inspection requirements matter.
Repeated heat cycles expand and contract metal, seals, welds, and mounting points. Tiny cracks may develop gradually. Moisture and road salt accelerate corrosion.
Short journeys may leave condensation trapped inside pipes and mufflers. The engine may not reach full operating temperature. Internal rust can quietly grow.
Check for rust bubbles, black soot, loose shields, cracked mounts, dents, and unusual rattles. Soot near a joint often indicates a leak. Do not dismiss small noises.
Clear condensation at the tailpipe is usually normal during cold operation. Repeated water near connections deserves inspection. Location matters.
Inspect the system when cold, using a bright lamp. Examine welds, clamps, hangers, heat shields, and joints. Never touch hot components.
Replace parts showing cracks, serious corrosion, damaged supports, or persistent leaks. A correct fit reduces vibration and uneven stress. Do not wait for failure.
Confirm pipe diameter, connection style, dimensions, and heat rating. Compare the new part with the removed component. Similar-looking parts may fit poorly.
Avoid curbs, rough impacts, and overloaded driving when possible. Replace weak hangers promptly. Keep records of noises, photos, dates, and mileage.
No. Hidden corrosion and internal restrictions may escape visual checks. A smoke test or backpressure measurement can provide extra evidence. No method is perfect.
Extending the life of an exhaust system begins with understanding how heat, vibration, moisture, road salt, and internal deposits contribute to wear. How to extend the service life of exhaust components depends on regular inspections and timely maintenance. Check pipes, joints, hangers, mufflers, catalytic sections, and shields for rust, cracks, loose connections, unusual discoloration, or excessive noise. Early detection can prevent minor damage from spreading and reduce the risk of unexpected failure.
Corrosion can be limited by keeping exhaust parts clean and removing accumulated dirt or salt, while suitable heat-resistant protective measures may provide additional defense. Proper engine tuning is also essential because an incorrect fuel mixture or ignition setting can create excessive heat and accelerate component deterioration. The exhaust system should remain correctly aligned, securely supported, and free from unnecessary stress. When replacement is required, choose compatible, high-quality components that match the vehicle’s specifications and install them carefully. Combining inspections, cleaning, correct adjustment, and suitable replacement parts can improve reliability, performance, safety, and overall service life.

GLX Auto Parts