A flexible exhaust pipe may look like a small repair, but it sits close to hot components, sharp metal, and fumes. How to replace flexible exhaust pipes safely starts with treating the job as more than a quick cut-and-weld task. The U.S. Environmental Protection Agency’s 2024 Inventory of U.S. Greenhouse Gas Emissions and Sinks reports that transportation produced 28% of U.S. greenhouse gas emissions in 2022. That figure covers the whole transportation sector, not exhaust-pipe failures. Still, it shows why a sound exhaust system matters.
Safety deserves equal attention. The Bureau of Labor Statistics recorded 2.6 million nonfatal workplace injuries and illnesses in private industry during 2023. This broad workplace report does not identify exhaust repairs separately, but it is a useful reminder: routine jobs can still cause injuries. Hot tubing, unstable lifting points, and grinding sparks are easy to underestimate. Small details matter.
This guide focuses on practical checks: letting the exhaust cool, supporting the vehicle on rated stands, matching pipe diameter and length, and inspecting nearby hangers before cutting. Use the vehicle maker’s service information and the replacement part’s specifications; fit varies by model. Wear eye protection and gloves, and work where fumes can disperse. A rushed cut can leave a poor alignment that strains the new flex section. I have to admit, even an experienced repair can miss a tired hanger on the first look. Careful inspection helps prevent that.
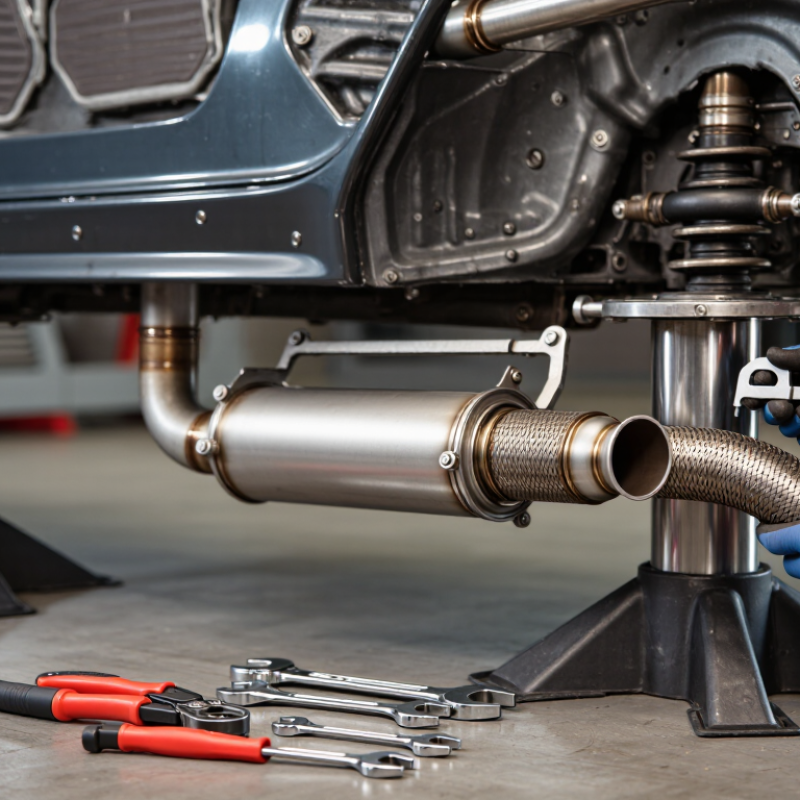
Understand the Flexible Exhaust Pipe and Confirm the Fault
A flexible exhaust pipe absorbs engine movement and vibration between rigid sections. Its braided outer mesh protects an inner bellows, but the braid can look intact while the bellows has cracked. Look closely. With the engine fully cool, inspect for broken strands, black soot, rust, dents, or a split near the welds. A ticking sound during acceleration, exhaust odor in the cabin, or a sudden change in noise may point to a leak. These clues are not proof by themselves; a loose clamp or damaged gasket can produce similar symptoms.
Confirm the fault before replacing anything. A workshop can use a smoke test or carefully check for escaping gas; avoid touching hot parts or working beneath a vehicle supported only by a jack. The CDC reports that more than 400 people in the United States die each year from unintentional, non-fire-related carbon monoxide poisoning. That figure is not specific to vehicle exhaust, but it underlines why cabin fumes deserve prompt attention. A warning light alone does not identify a failed flex pipe. Check diagnostic codes, inspect nearby joints, and compare the sound at different engine speeds. It is tempting to blame the most visible damage. Sometimes that guess is wrong.
Prepare Safety Gear, Tools, and a Stable Work Area
Before replacing a flexible exhaust pipe, let the system cool completely and work outdoors or with effective exhaust extraction. Carbon monoxide has no color or smell. NIOSH lists a recommended exposure limit of 35 ppm over a workday, with a 200 ppm ceiling in its Pocket Guide. These figures are exposure limits, not a reason to run an engine in a closed garage. Keep the engine off whenever possible, and use a suitable carbon monoxide monitor if testing is unavoidable.
Set the vehicle on level, solid ground, chock the wheels, and support it with correctly rated jack stands at the manufacturer’s specified lift points. Never rely on a jack alone. Wear safety glasses, snug work gloves, and long sleeves; rust flakes often drop when clamps are loosened. Gather the replacement pipe, correctly sized sockets, penetrating oil, a torque wrench, and suitable cutting tools before lifting the vehicle. Keep a fire extinguisher nearby if the work involves heat or sparks.
Clear the floor of cords, oil, and loose tools so you can move without twisting beneath the car. Check that stands sit flat and do not rock before reaching under the vehicle. I still find that a quick stability check is easy to rush, especially when a stubborn clamp delays the job. Pause, inspect the supports again, and stop if the vehicle shifts or the work area feels cramped.
How to Replace Flexible Exhaust Pipes Safely 7 Tips - Prepare Safety Gear, Tools, and a Stable Work Area
| Tip |
Preparation |
What to Do |
Safety Check |
| 1 |
Let the exhaust cool |
Park the vehicle and allow the exhaust system to cool completely before touching or cutting any components. |
Exhaust parts can remain hot after the engine is switched off. Confirm they are cool to the touch before starting work. |
| 2 |
Wear appropriate safety gear |
Use safety glasses, work gloves, and suitable clothing that covers exposed skin. Wear hearing protection when using loud cutting tools. |
Cutting and brushing can send rust, metal fragments, and sparks into the air. Use protective equipment suited to the task. |
| 3 |
Choose a stable work area |
Work on a level, firm surface with adequate lighting and enough room to move tools and exhaust components safely. |
Keep the work area clear of clutter and flammable materials, especially if a cutting tool may create sparks. |
| 4 |
Secure the vehicle correctly |
Apply the parking brake, place wheel chocks, and raise the vehicle only at the lifting points specified in its service information. |
Support the vehicle with correctly rated jack stands on firm ground. Never work beneath a vehicle supported only by a jack. |
| 5 |
Gather the right tools |
Prepare suitable hand tools, penetrating oil, a measuring tool, and an appropriate exhaust-cutting tool if removal requires cutting. |
Inspect tools before use and follow their operating instructions. Keep hands clear of cutting edges and moving parts. |
| 6 |
Check the replacement pipe |
Compare the replacement section with the original for pipe diameter, length, connection style, and available clearance before installation. |
Confirm the part is suitable for the vehicle and exhaust layout. Incorrect fit can cause leaks, contact with nearby components, or excessive strain. |
| 7 |
Support and inspect the exhaust |
Support the exhaust section before loosening connections. Check hangers, clamps, and nearby parts, and allow fresh air to circulate around the work area. |
Do not run the engine in an enclosed space. If a test is needed, move the vehicle outdoors and check for leaks only after installation is complete. |
Inspect the Exhaust System and Locate the Replacement Cuts
Let the exhaust cool completely before inspecting it; even a parked vehicle can hold heat for a long time. Raise the vehicle only on a firm surface, using properly rated jack stands at approved support points. Wear eye protection, since rust flakes and dust often fall when you touch older pipes. Keep your hands clear of sharp edges.
Follow the exhaust from the engine toward the tailpipe. Look for a split flex-pipe braid, soot marks, loose hangers, crushed sections, and rusty joints. A faint ticking sound or exhaust smell can help pinpoint a leak, but neither tells you exactly where to cut. Check nearby wiring, oxygen sensors, brackets, and bends. Take your time here. A damaged hanger may be the real problem, not the flex pipe.
Mark the intended cuts on sound, straight pipe on both sides of the flexible section. Leave enough clean metal for the replacement to fit securely, and compare the available space with the replacement pipe’s length and connection style. Avoid cutting through welds, bends, or sensor bungs. Measure twice, then look again from underneath; awkward viewing angles can make a straight section seem longer than it is. If corrosion extends beyond your marks, reassess before cutting.
Remove the Damaged Pipe and Fit the New Flexible Section
Start with a fully cooled exhaust system on level ground, then support the vehicle with rated jack stands. Never rely on a jack alone. Wear eye protection and gloves; rust flakes often drop when clamps loosen. Keep the engine off and work outdoors or with professional exhaust extraction. The NIOSH Pocket Guide lists carbon monoxide limits of 35 ppm over a 10-hour workday and a 200 ppm ceiling. Those limits are not a reason to tolerate fumes—leave the area if exhaust enters your breathing space.
Mark the damaged section and note the pipe diameter, length, and direction of the flex braid before cutting. Remove nearby hangers or sensor wiring from the cutting path. A reciprocating saw can make a clean cut, but leave enough straight pipe for the replacement’s sleeves or welds. Deburr the ends, then test-fit the new section without forcing it into alignment. Small twists are easy to miss. I still check twice.
Center the flex section with the exhaust hanging naturally, and confirm it clears the floor, suspension, and heat-sensitive parts. Tighten suitable clamps evenly, or have a qualified technician weld the joint if the design requires it. Refit hangers and wiring, then inspect for movement and leaks using a shop-approved method. If the pipe sits under tension, stop and correct the fit; a rushed installation can crack again.
How to Replace a Flexible Exhaust Pipe Safely
Seven practical tips for removing a damaged pipe and fitting a new flexible section.
The bars count checklist points for each stage, not time or a vehicle-specific specification. Let the exhaust cool completely, use properly rated jack stands on firm ground, and follow the vehicle service manual for fitment and joining details. Keep clear of hot or moving parts when checking for leaks.
Secure the Joints and Check for Leaks Before Driving
Before replacing a flexible exhaust pipe, let the exhaust cool completely. Let it cool. Raise the vehicle on level ground and support it with properly rated stands; never rely on a jack alone. Remove rusted fasteners carefully, then compare the new pipe’s length and bend with the old one. A mismatch can pull the joints sideways and shorten the repair’s life.
Seat each joint fully and align the pipe without twisting or stretching the flex section. Tighten clamps to the vehicle maker’s specified torque, or follow the specified welding procedure. I may be overly cautious here, but a joint that looks tight can still leak. Check for loose hardware, gaps, and fresh soot marks around the connections before lowering the vehicle.
Start the engine outdoors, away from people and enclosed spaces. Listen from a safe distance; never put your hand near a suspected leak or crawl beneath a running, unsupported vehicle. A smoke test or exhaust-gas analyzer can confirm a doubtful joint. NIOSH’s Pocket Guide to Chemical Hazards lists a carbon monoxide recommended exposure limit of 35 ppm over 10 hours and a 200 ppm ceiling. These are occupational limits, not a garage target. If fumes, hissing, or soot remain, stop and have the connection inspected before driving.
FAQS
Let the exhaust cool completely. Gather the replacement, sockets, penetrating oil, torque wrench, and suitable cutting tools.
Park on level, solid ground, chock the wheels, and use correctly rated jack stands at the specified lift points. Never rely on a jack alone.
Wear safety glasses, snug gloves, and long sleeves. Rust flakes can fall when clamps loosen.
Work outdoors or use effective exhaust extraction. Keep the engine off whenever possible, and leave if exhaust enters your breathing space.
Mark the section and note the pipe’s diameter, length, and flex-braid direction. Move nearby hangers and sensor wiring out of the cutting path.
Leave enough straight pipe for sleeves or welds. Deburr the ends, then test-fit without forcing alignment. Small twists are easy to miss.
Let the exhaust hang naturally and check clearance from the floor, suspension, and heat-sensitive parts. I still check twice.
Stop and correct the fit before tightening further. Use suitable clamps evenly, or have a qualified technician weld the joint if needed. A rushed fit may crack again.
Conclusion
How to replace flexible exhaust pipes safely begins with confirming that the flexible section is actually damaged. Look for cracks, corrosion, loose connections, and signs of exhaust leakage, while remembering that similar symptoms can come from other parts of the exhaust system. Let the vehicle cool completely, work in a well-ventilated area, and support it securely on suitable stands before starting. Wear eye protection and gloves, and prepare the tools and replacement section in advance.
Inspect the exhaust system to identify the best places to cut, taking care to avoid nearby components and preserve enough pipe for secure connections. Remove the damaged section carefully, then position the new flexible pipe so it aligns naturally without twisting or strain. Tighten the joints evenly and check that the assembly is firmly supported. Before driving, start the vehicle outdoors and listen and feel carefully around the connections for leaks, keeping hands clear of hot or moving parts. Recheck the joints after the exhaust cools.

 GLX Auto Parts